Battle Analysis
73 Easting (February 1991): a cavalry troop in a sandstorm and the limit of advance
· 1991-02-26 – 1991-02-27
Overview (BLUF)
At about 1600 on 26 February 1991, Eagle Troop, 2nd Squadron, 2nd Armored Cavalry Regiment, US VII Corps (nine tanks, scout Bradleys, about 120 soldiers) ran into the defensive positions of the Republican Guard Tawakalna Mechanized Division in the southern Iraqi desert. The troop put its tanks in the lead, suppressed a village strongpoint and hit a T-72 position at close range beyond a rise. It then did not stop at the 70 Easting limit of advance (LOA), but pushed on to around 74 Easting and struck the enemy reserve as it began to move. According to the troop commander's essay the main fight lasted about 23 minutes (sources 1, 2).
The battle shows both the initiative to go past a control measure within the commander's intent and the risks that come with it. Scholarly work attributes the result to US technology and skill meeting Iraqi errors in preparing the defence (source 5): neither factor alone, on this view, would have produced so one-sided an outcome.
Background and Strategic Context
On 26 February, the third day of the ground war, VII Corps had crossed southern Iraq and was wheeling east against the Republican Guard. The 2nd ACR, leading the corps, was to find and fix the Tawakalna Division and then pass the 1st Infantry Division through (sources 2, 6). The regiment was told to avoid becoming decisively engaged. Its LOA was first set at 60 Easting and, after contact with the Republican Guard security zone, moved to 70 Easting at about 1500 (source 2).
An "Easting" is a north–south grid line on the map, one kilometre apart. With almost no landmarks in the desert, unit positions and control lines were marked by these grid lines.
Terrain and Weather
The battlefield is flat desert with low, barely visible rises and wadis (dry stream beds). It rained the night before; on the morning of the 26th fog cut visibility to about 200 m, followed by a sandstorm. The regiment's aviation squadron was grounded for more than half the day (sources 1, 2). Eagle Troop had only 1:100,000 maps (source 1).
Poor visibility reduces the advantage of long-range fire. But the M1A1's thermal sights let its crews see first even through dust, and that difference appears to have counted heavily in the close-range fight beyond the rise (source 5).
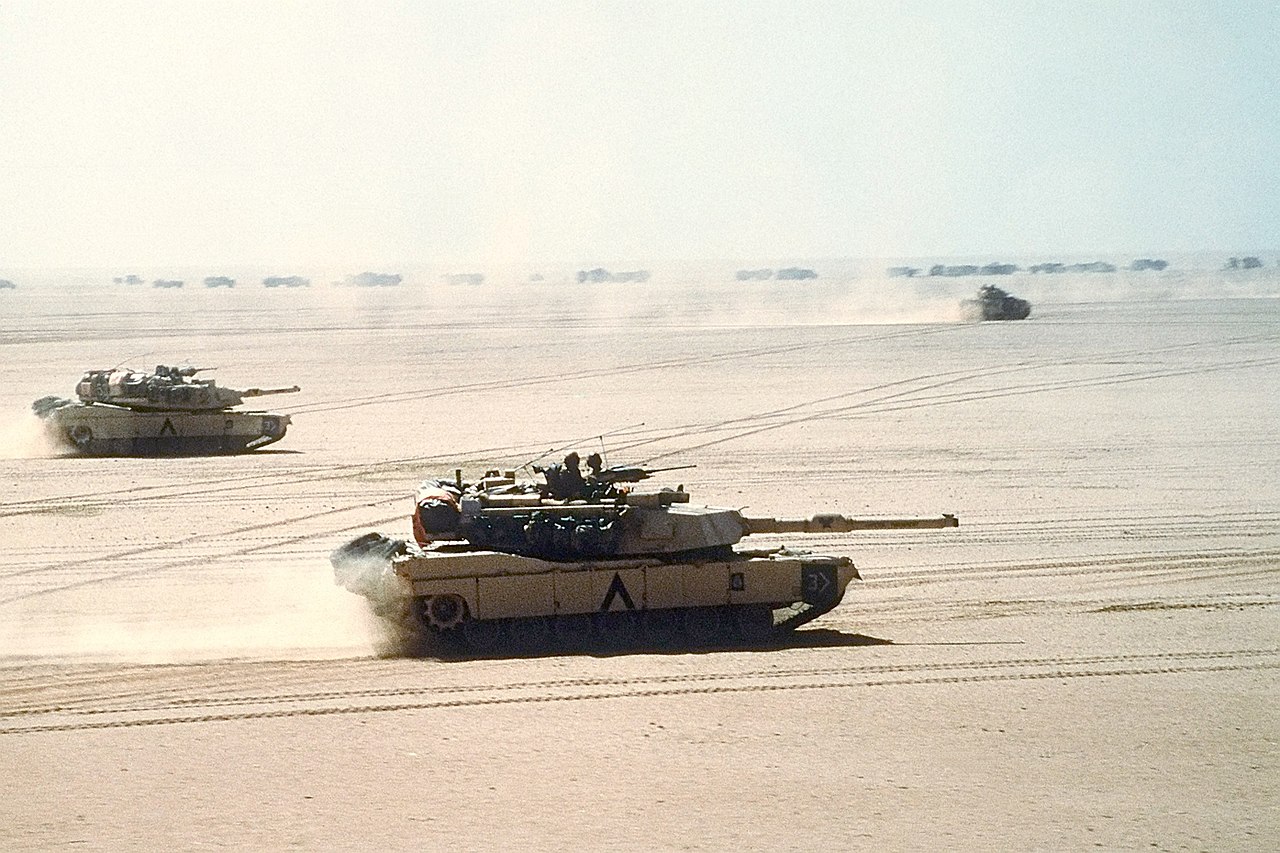 Photo 1. M1A1 tanks of the US 3rd Armored Division moving across the desert, with a Bradley behind (15 February 1991). Not a unit that fought at 73 Easting, but the same corps and the same equipment — Photo: US Navy photographer (DoD asset DNST9207834), public domain (US federal government work), via Wikimedia Commons
Forces and Dispositions
- US: 2nd Squadron's G, E and I Troops advanced east side by side, G in the north, E in the centre, I in the south. A cavalry troop had nine tanks, 12–13 Bradleys, mortars and about 120 soldiers (source 2). Eagle Troop moved in a modified column: one scout platoon leading in a vee with the mortars behind it, the nine tanks in a wedge behind them, and the other scout platoon covering the southern flank (source 1).
- Iraqi: elements of the Tawakalna Mechanized Division, chiefly the 18th Mechanized Brigade, held prepared positions with a tank reserve (sources 2, 3). The US Army commemorative article speaks of two brigades, and Wikipedia also names a brigade from another division, so the brigades engaged differ between sources.
Course of the Action
 Figure 1. Battle of 73 Easting, sketch map (26 Feb 1991). Scale is fitted to the 1 km Easting interval and unit positions are approximate — our own work, reconstructing the course from sources 1–3 on the scenario map
- Move and first contact (1520–1607): the regiment issued a fragmentary order. At 1607 Eagle Troop drove over an Iraqi early-warning bunker and took two prisoners. Moments later 23 mm cannon and machine-gun fire came from a village ahead (sources 1, 2).
- Village and the fight beyond the rise (1607 to about 1620): the troop moved its tanks in front of the scouts and suppressed the village. As the tank wedge topped a rise, eight T-72s sat in prepared positions on the reverse slope near 70 Easting, and the troop hit them at close range (source 1).
- Past the LOA (after 1620): the troop did not stop at 70 Easting. It went through an anti-tank minefield and an infantry position, some 3 km east to the high ground near 74 Easting, and struck a reserve of about 18 T-72s at close range as it was breaking out to move (sources 1, 2).
- Link-up and counterattack (about 1630 to dusk): scout Bradleys went north to regain contact with G Troop. At dusk a company-size T-72/BMP counterattack was stopped by long-range fire from the ridge. In the wadi to the north, G Troop faced repeated attacks for about six hours from 1830 (sources 1, 2).
- Passage of lines (night of 26th to early 27th): the 1st Infantry Division passed through the regiment to continue the attack. The troop commander's essay says just after 2200, Wikipedia 0200–0600 on the 27th; the time and sector differ (figure 2).
 Figure 2. Afternoon of 26 February to early 27 February. S marks the troop commander's essay, W Wikipedia (citing the official history Jayhawk! and others); times are approximate — our own work, based on sources 1–3
Decision Point Analysis
Decision 1: Formation at the moment of contact (Eagle Troop commander, 1607)
A scout Bradley was under fire from the village, visibility was about 200 m and nothing beyond the village was known. The options were (a) halt and report, (b) bypass the village, (c) fight with the scouts still in front, or (d) move the tanks in front of the scouts and attack. The commander chose (d). A TOW and a tank round marked the village centre and all nine tanks fired high explosive into it. The aim was not to fight an unknown enemy with the lightly protected scouts in front, and with the scouts ahead of the tanks' line of fire the risk of fratricide was high too. Because of this switch the tanks were leading when the troop crossed the rise. This is the scenario's first-contact decision.
Decision 2: Stop at the limit of advance? (Eagle Troop commander, about 1620)
The executive officer reported reaching 70 Easting. The regiment's guidance was to avoid decisive engagement, and about 3 km east an enemy reserve was getting ready to move. The options were (a) halt at the LOA and report, (b) halt and fight by fire, (c) keep attacking, or (d) fall back to a screen line. The commander chose (c) and told higher headquarters that the troop was in contact and could not stop. He judged that the enemy had to be hit before it recovered from the shock, and cited a regimental climate that expected initiative from junior leaders (source 1). The reserve was destroyed before it could deploy. Going past the LOA, however, opens gaps with the troops on either side; the troop later had to send its scouts out separately to regain contact with G Troop to the north.
Decision 3: At the minefield (Eagle Troop commander, about 1625)
An anti-tank minefield lay on the way to the enemy infantry position. The options were (a) halt and breach deliberately, (b) have the tanks lead and steer around the mines with the Bradleys following in their tracks, (c) go around to the north, or (d) call artillery first and then advance. The troop chose (b). The mines appear to have been visible on the surface, so drivers could avoid them. A squadron operations officer's tank hit an AT mine, was lightly damaged and was soon fighting again (source 1). The choice accepted risk to avoid losing tempo before reaching the reserve.
Decision 4: Defensive layout and the reserve (Tawakalna 18th Brigade command)
The Iraqis could (a) take forward-slope positions with long fields of fire, (b) hold reverse-slope positions behind the rise with a reserve to the rear, or (c) counterattack early with a mobile reserve. Their layout came closest to (b). A reverse slope protects against long-range direct fire and air observation. But an analysis finds that the outposts failed to send any warning and that the positions were sand berms piled above ground rather than dug in (source 5). As a result the moment the Americans crossed the rise became a close-range surprise, and the reserve was hit while still forming up. In the same study's simulations, correcting both errors, the warning and the position preparation, sharply raised US losses (source 5).
Lessons
- Mission command (ADP 6-0): a control measure serves the higher intent. Going past one must rest on that intent, be reported at once, and come with management of gaps on the flanks and of fratricide risk.
- Reconnaissance and security (FM 3-98): scouts see, tanks fight. The less you know and the less you can see, the more your best-protected vehicles belong in front.
- Surprise and tempo: surprise lasts minutes. If you see first, mass the troop's fire at once and move on to the next target before the enemy recovers its balance.
- Organising a defence: without warning from security elements, dug-in positions, obstacles and coordinated fires, even a reverse-slope defence becomes the setting for a surprise.
- Technology and skill together: advantages such as thermal sights were greatest when trained crews met an opponent's mistakes (source 5). Equipment alone does not explain the outcome.
Unresolved Questions
- Iraqi losses in front of Eagle Troop differ widely between the troop commander's essay, Wikipedia and the regimental commemorative article. All are US claims with different scopes, so this text does not compare the figures (sources 1–3).
- Which Iraqi brigades were engaged (18th Mechanized, 9th Armored, a brigade from another division) differs between sources.
- Anti-tank minefield: the troop commander's essay describes crossing one, while the scholarly analysis finds no mines or obstacles at the defensive position (sources 1, 5). Location or extent may have differed.
- The time and sector of the 1st Infantry Division's passage (just after 2200 in 3rd Squadron's sector versus 0200–0600 on the 27th along 70 Easting) disagree.
- The official history Jayhawk! and the IDA reconstruction report blocked automated access (403) and could not be checked.
- Regimental losses (6 dead, 19 wounded) are Wikipedia's figures citing official works; the originals were not checked.
Want to command it yourself? Take Eagle Troop in this battle's training scenario and make the same decisions.
Sources
- The Strategy Bridge, "Eagle Troop at the Battle of 73 Easting" (troop commander's essay, 2016-02-26). https://thestrategybridge.org/the-bridge/2016/2/26/eagle-troop-at-the-battle-of-73-easting (accessed 2026-10-13)
- Wikipedia, "Battle of 73 Easting" (cross-check; cites Jayhawk! and others). https://en.wikipedia.org/wiki/Battle_of_73_Easting (accessed 2026-10-13)
- U.S. Army (Army.mil), "2nd Cavalry Regiment's Battle of 73 Easting remembered" (2016-03-15). https://www.army.mil/article/164153/2nd_Cavalry_Regiment_s_Battle_of_73_Easting_remembered (accessed 2026-10-13)
- Bourque, JAYHAWK! The VII Corps in the Persian Gulf War, U.S. Army Center of Military History, CMH Pub 70-73-1 (2002). https://history.army.mil/html/books/070/70-73-1/cmhPub_70-73-1.pdf (accessed 2026-10-13; automated access 403)
- "Victory Misunderstood: What the Gulf War Tells Us about the Future of Conflict", International Security 21, no. 2 (1996), reprint. https://comw.org/rma/fulltext/victory.html (accessed 2026-10-13)
- Institute for Defense Analyses, 73 Easting: Lessons Learned from Desert Storm via Advanced Distributed Simulation Technology (IDA D-1110, 1992), DTIC ADA253991. https://apps.dtic.mil/sti/pdfs/ADA253991.pdf (accessed 2026-10-13; automated access 403)
- Online Archive of California, finding aid for the 73 Easting simulation project papers (1991–1993). https://oac.cdlib.org/findaid/ark:/13030/kt8x0nd0f4/ (accessed 2026-10-13)
- U.S. Army, ADP 6-0 Mission Command, FM 3-98 Reconnaissance and Security Operations. https://armypubs.army.mil/ (accessed 2026-10-13)
- Wikimedia Commons, file page for the photo of M1A1 tanks moving across the desert (1991-02-15, public domain). https://commons.wikimedia.org/wiki/File:Abrams_in_formation.jpg (accessed 2026-10-13)